My Photography Journey
Falling in Love with Nature Photography
From the moment I grabbed my first camera, nature had me hooked. The colors, textures, and sheer beauty of the outdoors pulled me in like a magnet. Nature photography quickly became my obsession, offering endless chances to capture the essence of the wild. Whether it’s the delicate petals of a flower or the sweeping vistas of a mountain range, every moment tells a unique story.
One of the best parts of nature photography is the adventure. Stepping into the wild, I never know what I’ll find. Each hike, each trail, is a new chapter in my photography journey. From rustling leaves to chirping birds, every sound and sight becomes a potential subject for my lens. This excitement fuels my love for nature photography, pushing me to explore more and capture the untamed beauty around me.
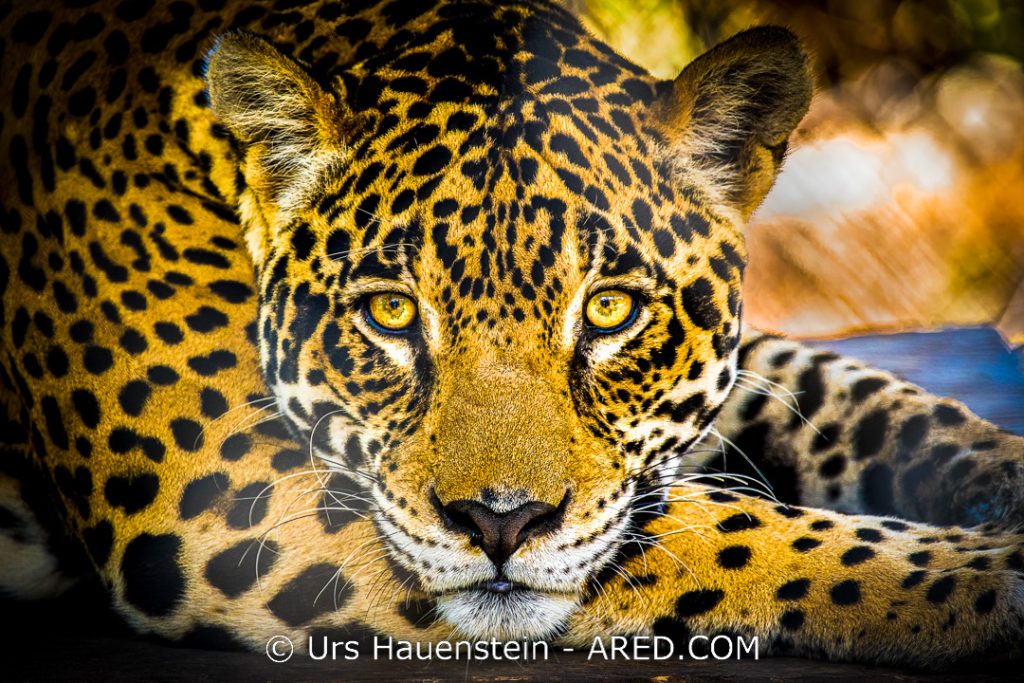
Jaguar – Panthera onca
Nailing Composition in Nature Photography
In nature photography, composition is king. It’s what turns a simple snapshot into a compelling image. When I first started, I quickly realized that a well-composed photo could tell a story, evoke emotions, and draw the viewer into the scene. Understanding composition became my mission, and I dove into learning various techniques to enhance my photos.
The Rule of Thirds, leading lines, and symmetry are just a few of the composition tools I rely on. By using these elements, I can guide the viewer’s eye through the frame, highlighting the beauty of nature. For example, using the Rule of Thirds helps me create balanced and visually appealing images by positioning key elements along the grid lines.
| Composition Technique | Description |
|---|---|
| Rule of Thirds | Dividing the frame into nine equal parts using two horizontal and two vertical lines |
| Leading Lines | Using natural lines to guide the viewer’s eye through the image |
| Symmetry | Creating balance by mirroring elements on either side of the frame |
Composition also lets me play with different perspectives and framing techniques. By changing my viewpoint, I can capture nature from unique angles, adding depth and interest to my photos. Whether it’s getting down low to photograph a flower or finding a high vantage point to capture a sweeping landscape, playing with perspective opens up a world of creative possibilities.
Through patience and practice, I’ve developed an eye for composition, honing my skills to capture the intricate details and grand landscapes of nature. This attention to detail and dedication to composition has helped me grow as a photographer and truly embrace the art of nature photography.
If you’re eager to dive deeper into nature photography, check out our article on advanced nature photography techniques.
Rule of Thirds
Getting the Hang of the Rule of Thirds
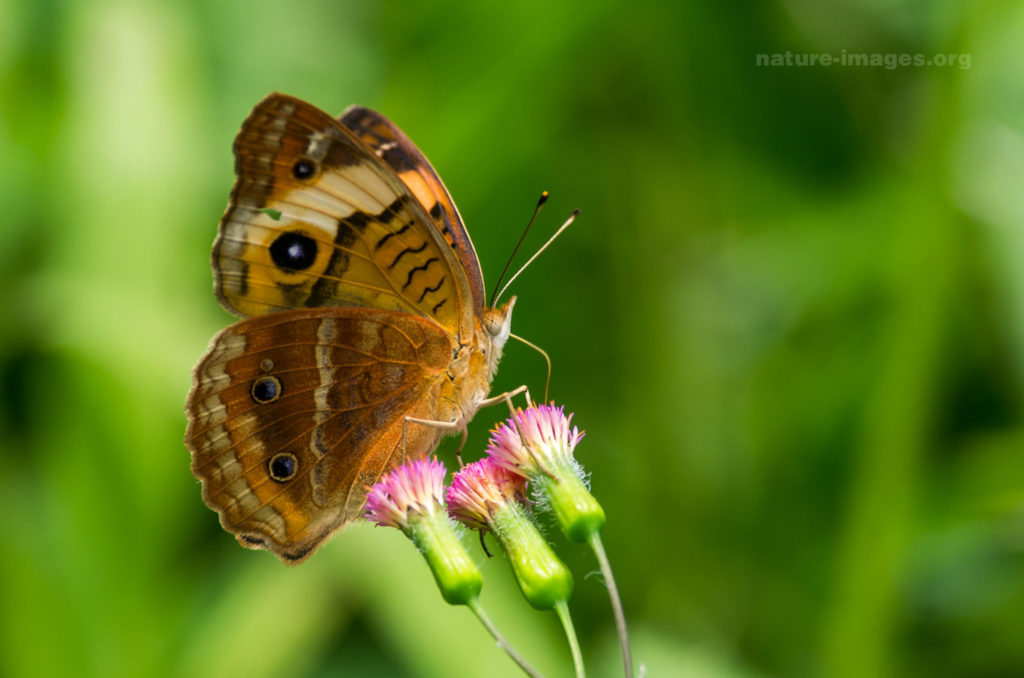
Common Buckeye Butterfly
When I first picked up a camera, one of the game-changers for me was the rule of thirds. It’s a simple trick that can make your photos pop. Imagine splitting your photo into nine equal parts with two horizontal and two vertical lines. The magic happens when you place the important stuff along these lines or where they cross.
| Rule of Thirds Grid | What’s It Do? |
|---|---|
| Horizontal Lines | Split the frame into thirds horizontally |
| Vertical Lines | Split the frame into thirds vertically |
| Intersections | Sweet spots where lines cross; perfect for key subjects |
Once I started using this rule, my photos looked more balanced and professional. It’s like giving your viewer a guided tour of your picture, making it more interesting and easy on the eyes.
Using the Rule of Thirds in Nature Photography

Applying the rule of thirds in nature photography has been a blast. Here’s my approach:
- Spot the Star: Whether it’s a towering mountain, a winding river, or a bright flower, I first figure out what the star of my photo is.
- Line It Up: I use the grid to line up my subject. For instance, I often place the horizon on the top or bottom third line instead of smack in the middle.
- Hit the Hotspots: Placing the main subject at one of the intersections where the lines cross helps draw attention to it.
| Scenario | Where to Put It |
|---|---|
| Mountains and Sky | Horizon on the top third line |
| Flower in a Field | Flower at an intersection point |
| Birds in Flight | Birds along a vertical line |
Practicing this technique has made my nature photos more lively and captivating. The rule of thirds is a lifesaver in landscape photography tutorials and wildlife photography techniques, where how you frame the shot can make all the difference.
For anyone who loves capturing the great outdoors, nailing the rule of thirds is a must. It’s not just about better composition; it’s about enjoying the whole photography experience more. If you’re hungry for more tips, check out advanced nature photography techniques.
Leading Lines and Symmetry
Using Leading Lines
In my photography adventures, I stumbled upon the magic of leading lines. These lines are like invisible guides that pull your eyes through the picture, adding depth and movement. Think of them as nature’s arrows, pointing you to the good stuff. They can be anything from rivers and pathways to tree branches. Whenever I frame a shot, I hunt for these elements to spotlight my main subject.
Take a mountain range, for instance. A winding river can lead your eyes from the foreground right up to the peaks. It’s like a visual journey that makes the photo pop.
| Element | Example |
|---|---|
| Pathways | Forest trails, mountain paths |
| Rivers | Streams, creeks |
| Tree branches | Overhanging branches, fallen logs |
Curious for more tips? Check out my nature photography tutorials.
Crafting Symmetry in Nature Photography

Symmetry in nature photography is like finding balance in chaos. It makes your photos look neat and satisfying. I get a kick out of spotting symmetrical patterns in nature, whether it’s a mirror-like lake or a bird with perfectly spread wings. Symmetry brings harmony and structure to your shots.
One trick I love is using reflections. Imagine capturing a mountain mirrored in a still lake—boom, instant symmetry. This works best during sunrise or sunset when the light is soft and the water is calm.
| Symmetry Type | Example |
|---|---|
| Reflections | Lakes, ponds |
| Balanced subjects | Birds in flight, twin trees |
| Natural patterns | Leaves, flowers |
If you’re into wildlife, symmetrical shots can also spice up your wildlife photography.
By nailing leading lines and symmetry, I’ve taken my nature photography to the next level. Want to dive deeper? Check out my advanced nature photography techniques.
Framing and Perspective
Framing Your Subjects
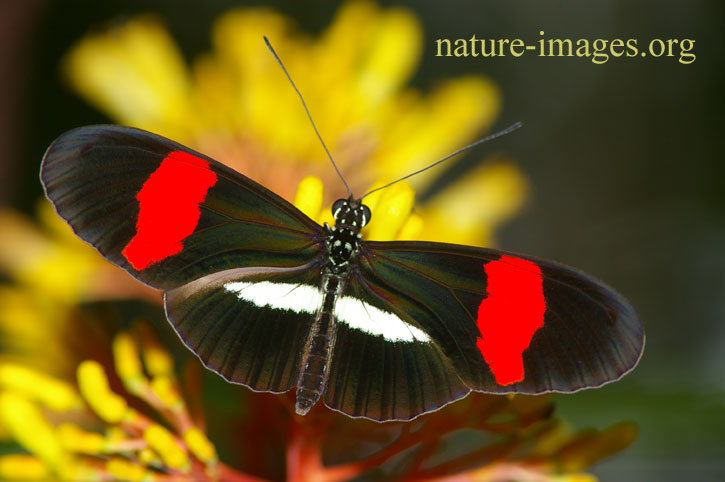
Postman Butterfly on yellow flower image taken in Panama
One of the coolest parts of nature photography is framing your subjects. Think of it like nature’s own spotlight, guiding the viewer’s eye right where you want it. I love using trees, branches, or even rocks to create natural frames around my subject. These elements add depth and context, making the photo pop.
When I’m out snapping pics, I look for ways the environment can frame the shot. Like using the arch of a tree to enclose a distant mountain or a pair of rocks to highlight a flower. It’s all about finding those natural elements that make your subject stand out.
| Natural Frame | Example |
|---|---|
| Trees | Framing a river or path |
| Rocks | Enclosing a flower or plant |
| Branches | Highlighting a bird or animal |
Want more tips? Check out landscape photography tutorials and wildlife photography techniques.
Playing with Perspective in Nature Photography
Perspective is another game-changer in nature photography. Changing your viewpoint can turn an ordinary scene into something extraordinary. One trick I love is getting down low to capture a flower or insect. This low angle makes the subject look larger and more impressive, creating a sense of closeness. On the flip side, shooting from a high vantage point can give a grand overview of a landscape, showing off its vastness.
Here are some perspectives I often play with:
- Low Angle: Perfect for flowers or insects, making them look larger-than-life.
- High Angle: Great for sweeping views of landscapes or dramatic shots of cliffs and mountains.
- Eye Level: Captures the world as we see it, ideal for wildlife photography to create a connection with the animal.
For more advanced tips, check out bird photography tips and tricks and advanced nature photography techniques.
By mixing up framing and perspective, my nature photos become more dynamic and interesting. Every outing is a chance to see the world in a new way and capture its beauty in unique shots.
Light and Shadows
Light and shadows are the secret sauce in nature photography, adding depth and drama to your shots. Let me share some tips on using natural light and shadows to make your photos pop.
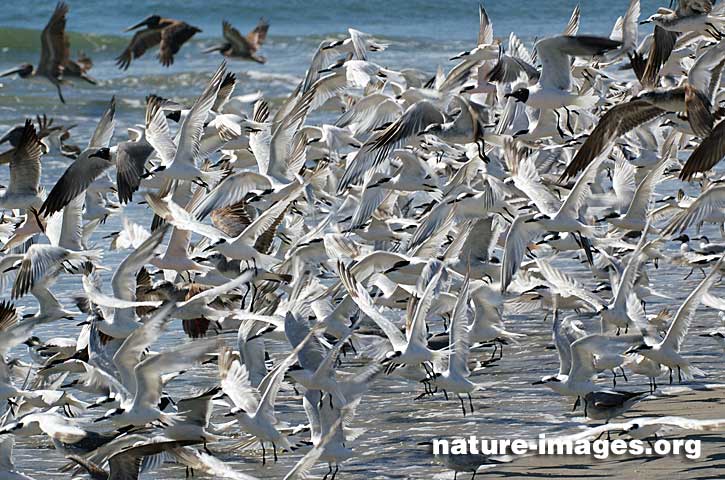
Flocking behavior is the behavior exhibited when a group of birds, called a flock, are foraging or in flight.
Playing with Natural Light
Natural light is the heart and soul of nature photography. It changes throughout the day, giving you endless chances to capture stunning images. I love shooting during the golden hours—right after sunrise and just before sunset. This soft, warm light makes colors glow and adds a magical touch to your photos.
Here’s how to make the most of natural light:
- Watch the Light’s Direction: Light from different angles creates unique effects. Front lighting lights up your subject evenly, while backlighting gives you cool silhouettes and a halo effect.
- Embrace Diffused Light: Cloudy days are your friend. They provide diffused light, which softens shadows and reduces harsh contrasts.
- Golden Hours: The hour after sunrise and the hour before sunset are perfect for capturing warm, soft light.
Using Shadows for Drama
Shadows can add mystery and depth to your photos. They highlight textures, create patterns, and guide the viewer’s eye through your composition.
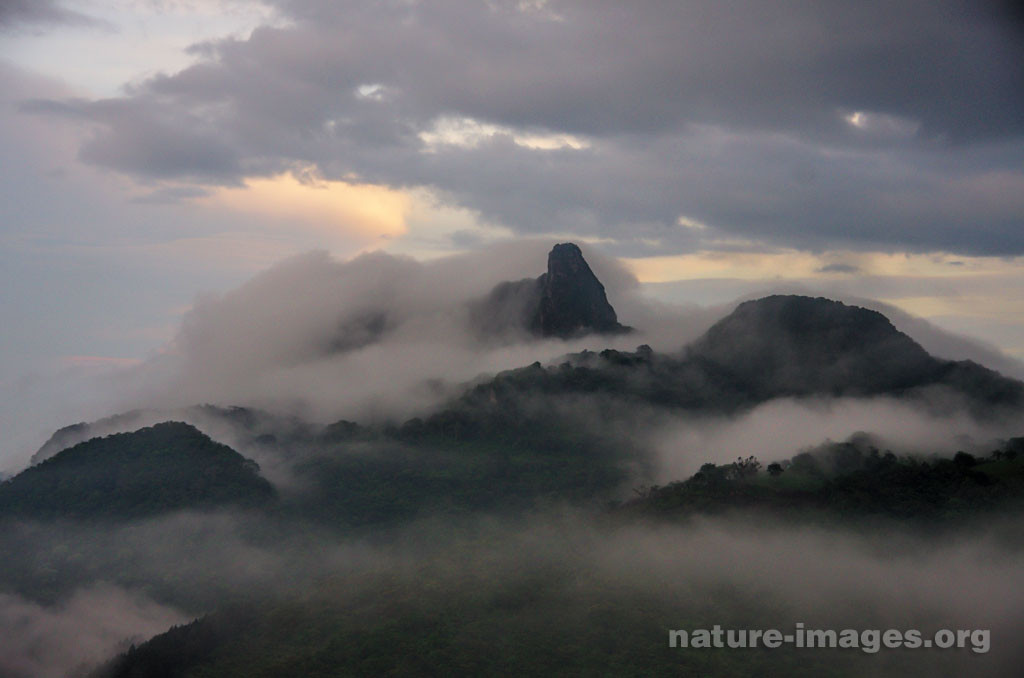
Mountain Cloud Forest Mist
Here’s how I use shadows to spice up my shots:
- Seek Contrast: High-contrast scenes with strong shadows can create striking images. These are often found during midday when the sun is high.
- Play with Patterns: Shadows cast by trees, leaves, and other elements can create interesting patterns on the ground or your subject.
- Create Silhouettes: Position your subject between the camera and a light source to create beautiful silhouette effects.
Mastering light and shadows can take your nature photography to the next level. For more advanced tips, check out our article on advanced nature photography techniques.
| Time of Day | Light Quality | Best For |
|---|---|---|
| Sunrise | Soft, warm | Portraits, Landscapes |
| Midday | Harsh, bright | High-contrast shots |
| Sunset | Soft, warm | Silhouettes, Portraits |
| Overcast | Diffused | Macro, Close-ups |
Use these tips to harness the power of light and shadows and create captivating nature photos. Remember, practice makes perfect. Keep experimenting with different lighting conditions and shadow patterns to find what works best for you. Happy shooting!
Patience and Practice
Sharpening Your Eye for Composition
When I first picked up a camera to capture nature, I quickly learned that getting the perfect shot isn’t just about clicking the shutter. It’s about seeing the world differently. I spent countless hours practicing techniques like the rule of thirds and leading lines to get better.
One trick that really helped me was going back to the same spots over and over. Each visit showed me new angles and perspectives. I played around with different ways to frame my shots to show off nature’s beauty. By looking at my photos and figuring out what worked and what didn’t, I slowly got better.
The Thrill of Capturing Nature’s Magic
There’s something magical about capturing nature with a camera. Every photo tells a story and can stir up emotions that words sometimes can’t. The thrill comes from the little things – the way light and shadows play, the symmetry of a scene, or the detailed patterns on a leaf.

I found a lot of joy in photographing everything from wildlife to landscapes to tiny insects. Each subject had its own challenges and rewards. For example, when I was shooting birds, I followed bird photography tips and tricks to get that perfect shot.
Here’s a table showing how many hours I spent practicing different aspects of nature photography composition over the past year:
| Composition Aspect | Hours Spent |
|---|---|
| Rule of Thirds | 50 |
| Leading Lines | 40 |
| Symmetry | 30 |
| Framing | 60 |
| Perspective | 45 |
With patience and practice, I developed a deeper love for the natural world. Each photo I took was a testament to its beauty and complexity. My journey in nature photography is far from over, and I can’t wait to capture more stunning moments.
If you’re looking to get better at nature photography, check out advanced nature photography techniques to boost your skills and creativity.
Please bookmark us now press ctrl+d and visit again soon for more fascinating nature images! Here some recommended links selected for you: The Best Books of the Month, Todays best Deals at Amazon, Best Sellers in Cell Phones & Accessories and last but not least the easy and great way to send a gift for the holidays: Amazon.com eGift Card (Instant Email or Text Delivery).
A selection of Nature images, wildlife, flora and landscape stock photos, to see many more images and to license our stock photos please see our complete collection of our wildlife, flora and landscape stock images here at Alamy.
Introducing our captivating photo book showcasing the mesmerizing flora and fauna of Panama! Dive into the vibrant world of biodiversity with stunning imagery capturing the essence of Panama’s natural wonders. From majestic birds to elusive wildlife and breathtaking landscapes, this book is a visual feast for nature enthusiasts.
Don’t miss your chance to own a piece of Panama’s natural heritage. Order your copy here at Amazon now and embark on a visual journey through the enchanting landscapes and fascinating wildlife of Panama!